Instagram is officially the world’s most popular social media channel with one billion users registered to its platform. Due to Instagram's visual nature, amongst other social media channels, including TikTok and YouTube, its popularity has led people to take more photographs than ever. In 2018, Guardian reported that 95 million photos were uploaded to Instagram per day. Whilst most photos are snapshots of our daily lives, there is an added pressure to show the best bits and take the most impressive photos. And there is no better opportunity for taking Instagram photos than when we’re travelling. To make our images look even better on screen than in reality, photo editing software comes in useful. If you’re looking to improve your travel photos, then check out 5 photo editing tips for holiday images.
Crop your travel photos
Photography 101 is to focus on a central point when you’re taking photos. This makes the end results more attractive for viewers. However, if your focal point seems too far away, don’t compromise on quality for a better shot. Instead, crop your images after you’ve taken them to make the focal point more prominent. Additionally, cropping your images will change the size and ratio, which suits various content formats for Instagram, which has two main posting formats ‑ posts in horizontal format and stories in vertical format. You can crop the image using photo editing software, such as the iPhone editing suite for quick changes to an image taken on your phone. If you're willing to spend more time editing your photo, Photoshop is a handy software, albeit more challenging to master. For faster results, upload your images to Autoenhance.ai. The AI will detect the central point in your image and instantly crop it for the best shot. 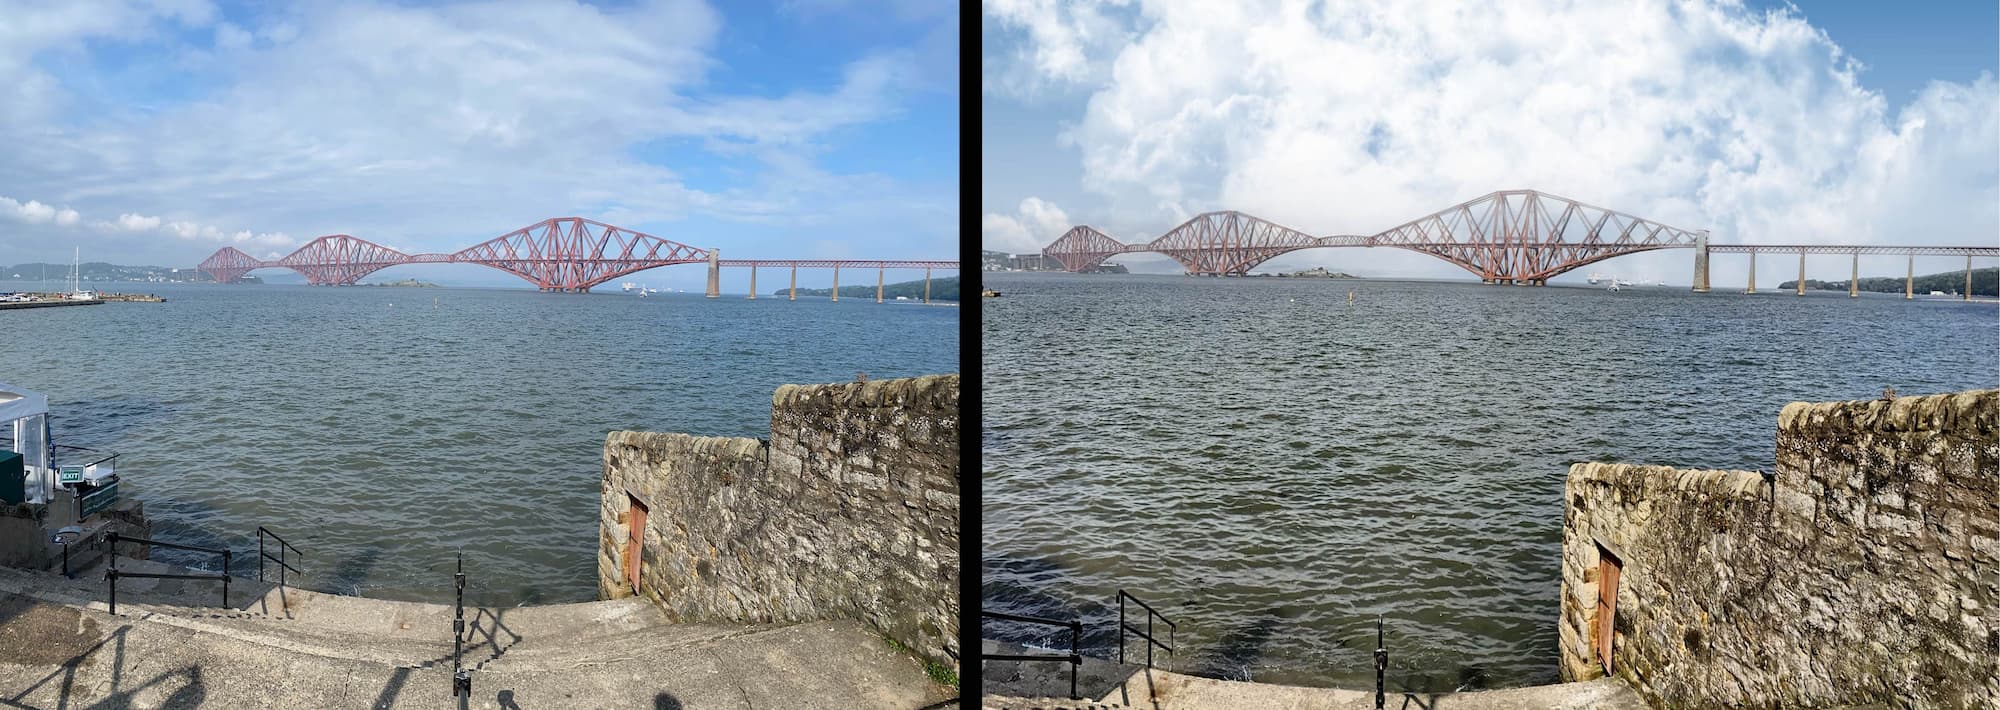 Correct perspective in your travel photos
Like cropping an image makes the end result more visually appealing to viewers, so does having a good perspective. The eye is taken round an image via the dominant lines in a photo. So any wonky lines in your Instagram image might lead to less likes and comments from your followers. Whether your images depict antiquated buildings, calming landscapes or stunning seascapes, the lines must be straight to represent a visually pleasing photo. If you’ve already taken a wonky image, you can use photo editing softwares to straighten your travel images.
Relighting your travel images
Do you ever come across an influencer’s profile and are instantly drawn to their amazing travel images? Before you know it, you’ve spent half an hour scrolling through their profile taking it all in. Your attraction to these images is partly due to the effect of colour and brightness. Viewers are attracted to images where brightness is sufficiently and evenly distributed. Colour also affects the level of emotional arousal in viewers, as an image with increased levels of saturation elicits feelings of happiness, and warmer hues in an image evokes feelings of excitement. When you’re taking travel shots, you become dependent on natural lighting. When it’s not a bright sunny day, you’ll need to use photo editing software to brighten your images afterwards.
Replace the sky in your travel photos
If you’re taking images outside, a dark overcast day might impact your travel photos. With a dull sky and dark shadows cast across the subject, it might throw off the entire vibe of your images ‑ which won’t do for Instagram. Luckily, you can make some changes after you’ve taken your photos. For example, use photo editing software to remove the background. Remove.bg is a handy tool for swapping out a grey sky. Replace the sky using Photshop and add another sky image to your background. If this sounds like a lot of hassle, use Autoenhance.ai to replace the sky in your travel photos; the AI photo enhancer automatically detects a dark sky and replaces it with a bright beautiful one. Read more in our recent blog post on adding a sky replacement to holiday images. With our sky packs, you can choose which type of sky you’d like to include in your photos, and depict either a crisp winter day or warm summer day.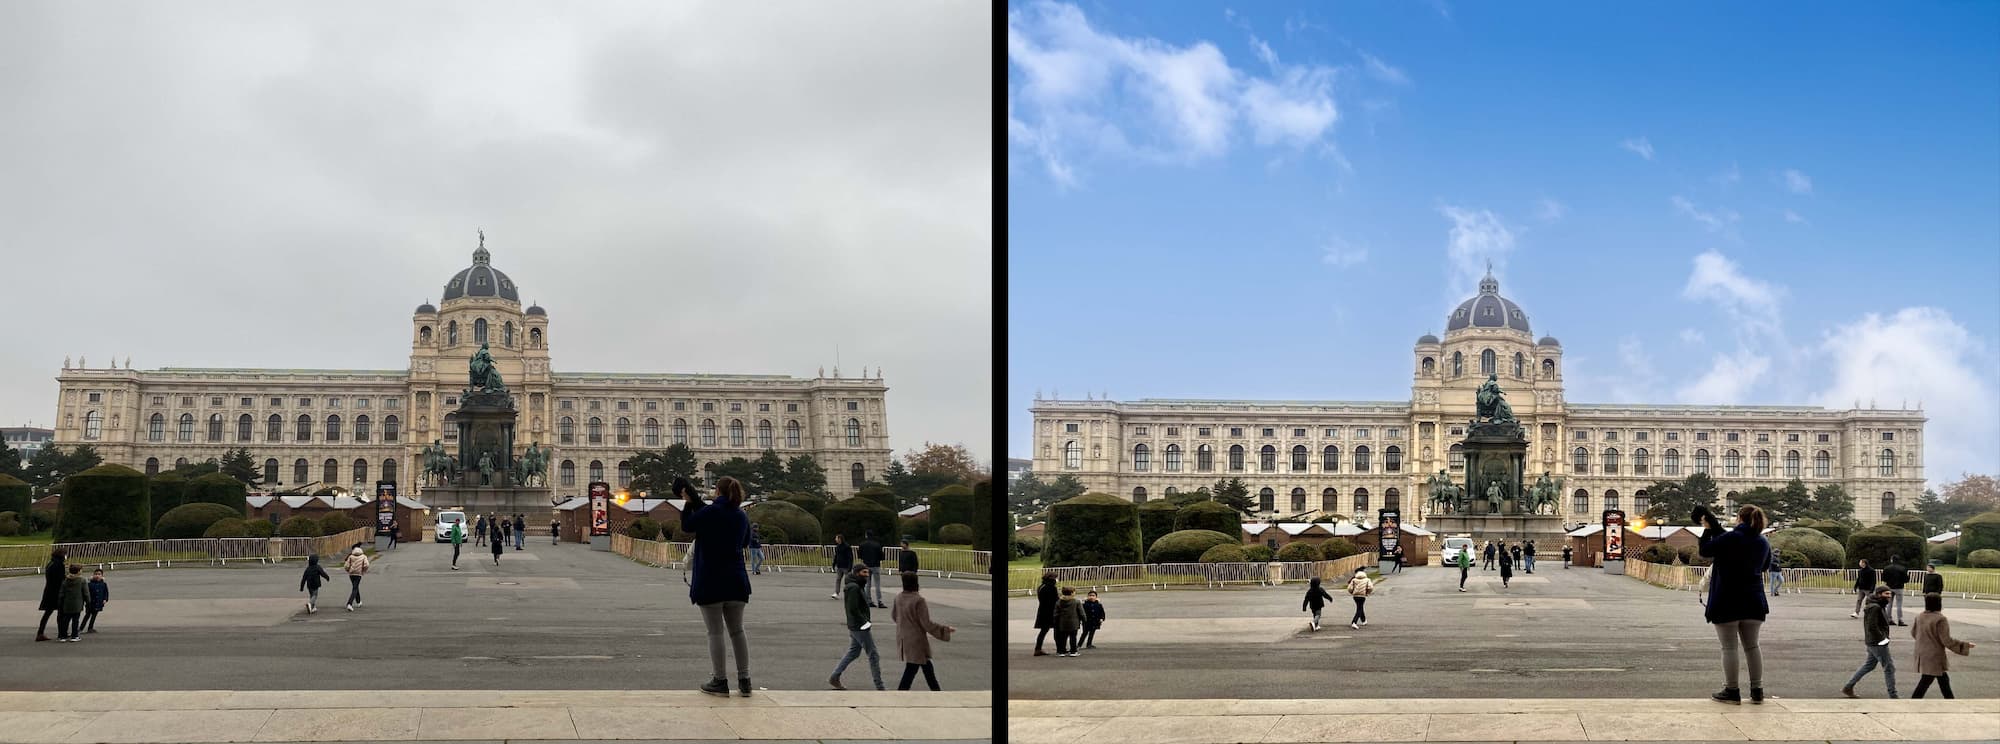
Use HDR merge for your travel images
For the keen photographers out there, you’ll be interested in how high dynamic range (HDR) improves your travel images. An image tends to have a low dynamic range, which makes it seem quite dark. HDR injects richness of colour into your image. During the photo editing process, combine a minimum of three images together ‑ normal image, over exposed image and underexposed image ‑ to enlarge the dynamic range and brighten the image. With Autoenhance.ai, you can use the HDR merge to combine your images together for instantaneous results.